Before you begin
If you struggle with sending/receiving push notifications to your app users, consider watching my course: Firebase on Android: Cloud Messaging and Cloud Functions. In the course I go into the details of sending/receiving push notifications in the various application states (App in foreground, background, and closed).
Table of Contents
- Introduction
- Prerequisites
- App Demo
- Getting Started
- Getting the Server Key
- Storing the Tokens
- FirebaseInstanceIdService
- FirebaseMessagingService
- Initalizing the Cloud Function
- Building the Firebase Cloud Function
- Deploying the Cloud Function
- Finishing Up
- Summary
All Source Code is available on my Github for free.
Introduction
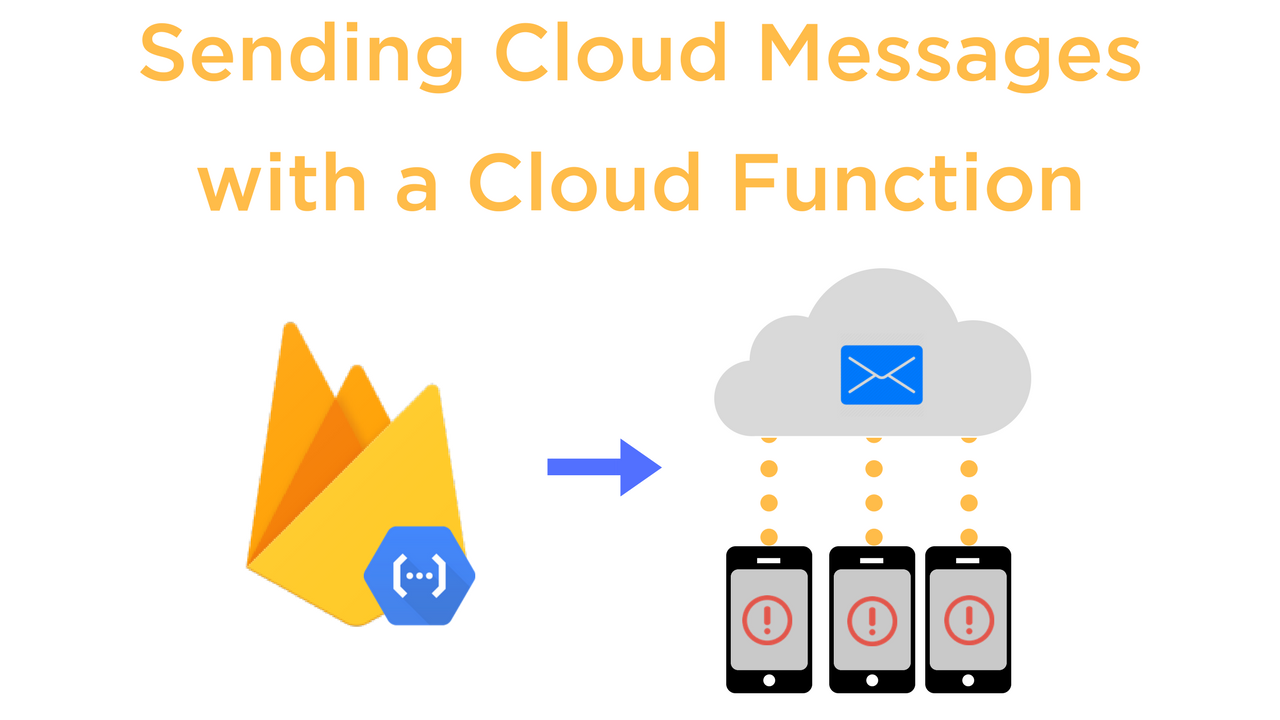
In this post we'll talk about how to send Firebase Cloud Messages to specific app-users by referencing their unique Firebase Cloud Messaging Token. To send the Messages we're going to use an HTTP POST request. After reading this post you'll be able to send Cloud Messages to any app-user. The Cloud Messages will generate Push Notifications that display in the system tray.
Prerequisites (What I assume you know)
- How to create a Firebase Project
- How to connect an Android Project with a Firebase Project
App Demo
Here's a visual of the simple app we'll be building:
The App will have 3 activities total.
-
A Registration Screen

-
A Login Screen

-
A Screen listing all users

When you click on a user from the list a dialog will pop up where you can enter a new message.

The user on the receiving end will see a push notification show up in their system tray.

Pretty simple stuff. I know it's not aesthetically pleasing but the purpose is to demonstrate how to send Firebase Cloud Messages to users with a Firebase Cloud Function and building a push notification.
Getting Started
Start by creating a new Firebase Project and syncing it to your Android Project. You can use your own project or copy mine from github. Here's the link: Source Code
If you use my source code don't forget to replace the google-service.json file with yours from your Firebase Console.
After you sync, add these dependencies to your build.gradle app file:
Don't forget to add the maven reference to the build.gradle project file as it's required for any Firebase version > 11.2.0:
For users to be able to receive Cloud Messages they need a Firebase Messaging Token. This token is unique to their application instance. That means if a user logs into their account using two different devices, there will be two different tokens. The tokens are associated with the device, not the FirebaseUser instance. To send Cloud Messages we need to add the token to an HTTP POST request.
Here's the structure of the request:
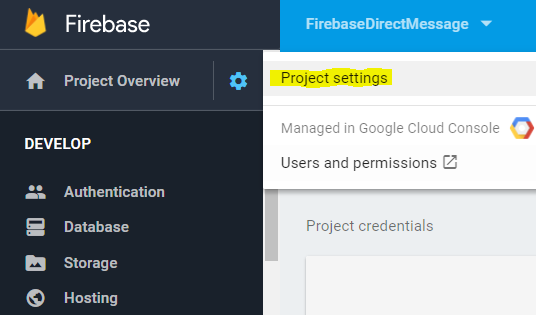
Getting the server key:
The server key can be found in the Firebase console by going to "project settings > Cloud Messaging".

Storing the Tokens
Since the Cloud Messaging request will be send using a Firebase Cloud Function, we need to save the tokens in a place that's easy to access. And I can't think of somewhere more suited that the Firebase database. We can easily query the database using a Cloud Function.
That being said we're going to save the tokens in the 'users' node in the database, in the 'messaging_token' field.
So how do we get the tokens? There's two ways:
- By directly referencing the Firebase Instance:
FirebaseInstanceId.getInstance().getToken(); - And by extending the FirebaseInstanceIdService class.
Obviously the first way is easy but the second way requires a little more code. And unfortunately we can't skip #2 because it's responsible for keeping the tokens up-to-date. Your probably confused by what I just said. Let me explain.
Firebase (seemingly randomly) changes the tokens to something completely different every once in a while. As implied by my parentheses it seems random. And if the token they have in their records doesn't match the token that we have in the database, the Cloud Message won't be sent. You've probably already figured this out but we're going to build a service-class that extends FirebaseInstanceIdService that will trigger when Firebase decides to refresh the tokens. We can then take the new token and insert it into the database.
Okay so let's start with #1.
In your application open the activity the user is sent to once they're authenticated. If your using my source code then that's "UserListActivity.java". Now build methods for getting the token and then inserting the token into the database. Here's what mine looks like:
Just call "initFCM()" in the onCreate method and it will insert the token into the database.
Now we're ready to work on the FirebaseInstanceIdService.
FirebaseInstanceIdService
Create a new java class and call it "MyFirebaseInstanceIdService". Actually you can call it whatever you want, that's just what I like to call mine. Here's the code:
Since it's a service, we need to declare it in the Manifest. So add this to your Manifest inside the 'application' tags. Here's what your manifest should look like at this point:
So now whenever Firebase decides to change the tokens they'll be refreshed and updated in our database.
FirebaseMessagingService
Now we need a way to receive the Cloud Messages that are sent to the app instance. You probably guessed what I'm going to say: we're going to create another service class and extend "FirebaseMessagingService".
Create a new java class and call it "MyFirebaseMessagingService". Once again the name isn't important that's just what I like to call it. Here's the code:
You'll notice that I've also included the code needed to construct the push notifications. I'm not going to explain it since this post is focused on receiving Cloud Messages. If you need some more information on building notifications I suggest checking out the Android Developer docs. The documentation for notifications is surprisingly good compared to a lot of the other examples: Developer docs.
Now let's declare the service in the manifest like last time. At this point your manifest application tags should look like this:
Note: I created my service classes inside the "utility" package of my project. So my service declaration might look a little different than yours if you created your classes in the main package directory, or some other package.
Initializing the Android Project for using Cloud Functions
-
Installing Node.js:
- Download and install Node.js onto your system: nodejs.org
-
Install the Firebase Command Line Interface (Firebase CLI):
- Open a new command prompt and type:
npm install -g firebase-tools -
When it's done you'll see an output like this:

- Open a new command prompt and type:
-
Login to Firebase:
firebase login -
Initialize the use of Firebase Functions:
-
Navigate to the Android Project directory and open a command prompt. Then type:
firebase init functions
-
Select your Firebase Project:

-
Press 'y' and install the npm dependencies:

-
When it's done you'll three new things in your project directory:
- A "functions" folder
- A .firebaserc file
- A firebase.json file

-
Navigate to the Android Project directory and open a command prompt. Then type:
Building the Firebase Cloud Function
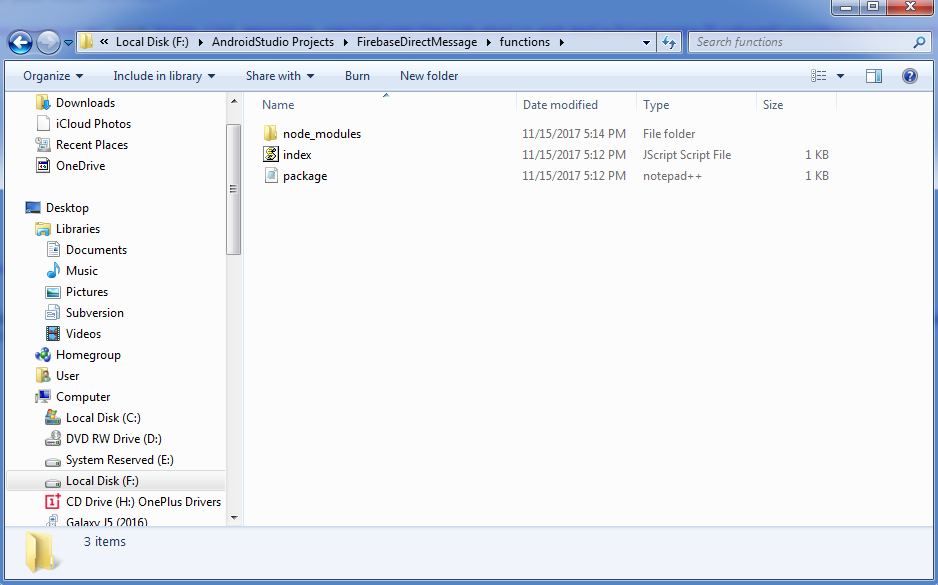
You build the Cloud Functions in a file name index.js. The index.js file is located inside the "functions" folder that you just created by initializing Cloud Functions.
Here's the Cloud Function: **Keep in mind your database needs to be structured exactly like mine for this work** I've added a lot of comments to help you understand what's happening.
Deploying the Cloud Function
After you've build the cloud function we just need to do one last thing, deploy it to Firebase. Be patient this can take a while.
firebase deploy --only functions
Finishing Up
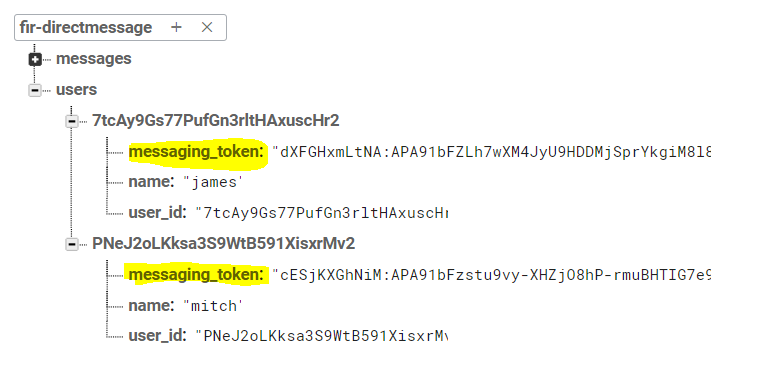
Here's a snapshot of my database if your confused at all:

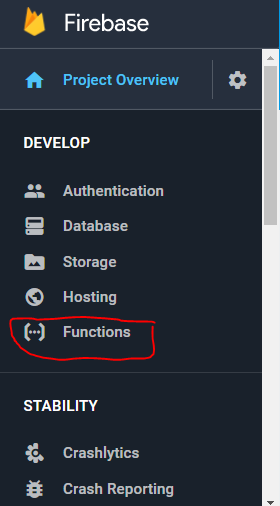
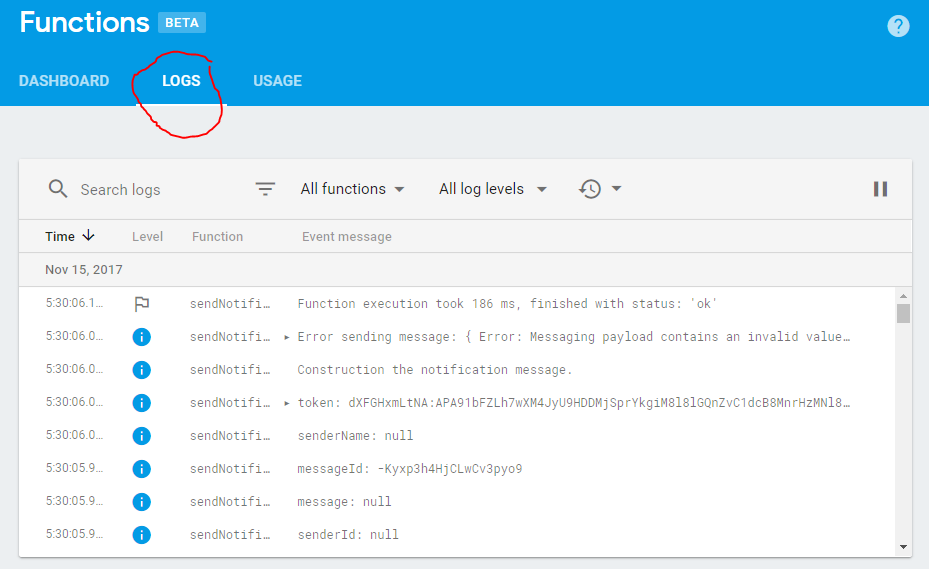
If your database structure is different than mine and you're therefore making changes to the Cloud Function I provided, you'll want to know where the Cloud Function logs are printed. You can find them by going to your Firebase Console and navigating to the "Functions" section.
Select the "Logs" tab. This is where all the logs from the cloud function will print. Use this to debug your function if your having problems.
Summary
Hopefully you found this helpful and can now integrate Firebase Cloud Messaging (FCM) and Firebase Cloud Functions into your Android projects.
If you struggle with sending/receiving push notifications to your app users, consider watching my course: Firebase on Android: Cloud Messaging and Cloud Functions. In the course I go into the details of sending/receiving push notifications in the various application states (App in foreground, background, and closed).
Staying in the Loop
If you want to stay in the loop and get an email when I write new blog posts, Follow me on Instagram or join the CodingWithMitch community on my website. It only takes about 30 seconds to register.
Authors

Create an Account
Similar Posts
CodingWithMitch Members
Unlimited access to all courses and videos
Step by step guides to build real projects
Video downloads for offline viewing
Members can vote on what kind of content they want to see
Access to a private chat with other communnity members & Mitch
CodingWithMitch Members
Unlimited access to all courses and videos
Step by step guides to build real projects
Video downloads for offline viewing
Members can vote on what kind of content they want to see
Access to a private chat with other communnity members & Mitch
Comments