Introduction
In this post I show you how to use a RecyclerView to display list items with an image and text.
You'll learn to build a recyclerview adapter class from scratch and display images and text. To retrieve the images from the internet we use the "Glide" library.
This is a perfect example if you're a beginner and need a step-by-step example on how to use a recyclerview in your android project.
All Source Code is available on my Github for free.
App Demo
Here's a visual of the simple app we'll be building:
The app will have a single activity with a Vertical RecyclerView:
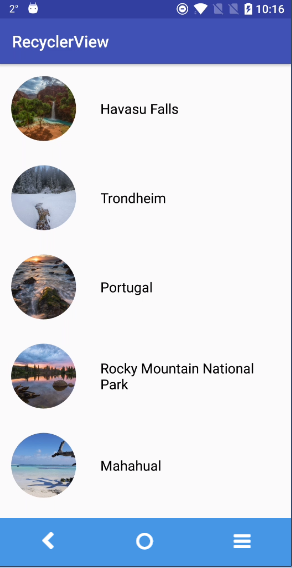
The user will be able to scroll up and down the list. If they click on a list item, a Toast will appear and display the name of the location.
Dependencies
We'll start with the dependencies:
We have the RecyclerView support library that's required for using RecyclerViews. The Glide library for retrieving and displaying images from the internet. And a CircleImageView library for displaying circular images.
build.gradle (app file)
Layouts
Next we have the layouts.
activity_main.xml
activity_main is simple. There's just a RecyclerView widget with a vertical orientation for holding our list items.
layout_listitem.xml
layout_listitem is the layout for the individual list items that we'll be inflating in the RecyclerView. As you can see there's just a Circular ImageView widget and a TextView where we'll display the name of the location.
Java Classes
We just have two java classes: RecyclerViewAdapter.java and MainActivity.java.
RecyclerViewAdapter.java
The RecyclerViewAdapter class is for adapting our individual list items to the RecyclerView list.
It works by saving the widgets in memory using the ViewHolder, then inflating them one-by-one as the user scrolls the list. Only the widgets in view are loaded into the list. This helps to improve app performance.
if you're familiar with ListView's and the "ViewHolder Build Pattern," it's essentially the same principal.
MainActivity.java
MainActivity is very simple.
We just get some random image urls from the internet and add them to an ArrayList named "mImageUrls." We also add some location names to a separate ArrayList called "mImageNames."
The two ArrayList's are passed to the RecyclerViewAdapter class, then the adapter is set to the RecyclerView in the "initRecyclerView" method.
Internet Permissions
Don't forget to add internet permission to the manifest.
Summary
Hopefully this helped you integrate a RecyclerView into your Android projects.
Staying in the Loop
If you want to stay in the loop and get an email when I write new blog posts, Follow me on Instagram or join the CodingWithMitch community on my website. It only takes about 30 seconds to register.
Authors

Create an Account
Similar Posts
Playing Video in a RecyclerView with ExoPlayer
March 4, 2019
Filtering a RecyclerView with SearchView
March 4, 2019
Kotlin RecyclerView Template (DiffUtil and AsyncListDiffer)
Sept. 13, 2019
RecyclerView OnClickListener
March 4, 2019
Staggered RecyclerView
March 4, 2019
Horizontal RecyclerView
March 4, 2019
SQLite and the Room Persistence Library
March 4, 2019
Swiping Views with ViewPager
March 4, 2019
CodingWithMitch Members
Unlimited access to all courses and videos
Step by step guides to build real projects
Video downloads for offline viewing
Members can vote on what kind of content they want to see
Access to a private chat with other communnity members & Mitch
CodingWithMitch Members
Unlimited access to all courses and videos
Step by step guides to build real projects
Video downloads for offline viewing
Members can vote on what kind of content they want to see
Access to a private chat with other communnity members & Mitch
Comments